February 27, 2026 | Music City Accelerator Team
You know that feeling when you’re three hours into a mix and everything sounds perfect until you turn up the volume? Suddenly your vocals are piercing, the snare is stabbing through your eardrums, and the hi-hats feel like they’re trying to escape through your skull. You back off the monitors, and everything sounds weak and dull again.
Welcome to the 2–5 kHz problem. It’s the frequency range that makes professional engineers earn their money, and it’s probably messing with your mixes right now.
Here’s the thing: this isn’t just about your ears being picky. There’s actual biology behind why this frequency range turns savage on you, and understanding it will change how you approach every mix from here on out.
Let’s talk about what’s happening inside your head. Your ear canal is about 2.5 to 2.8 centimeters long, which makes it a perfect quarter-wavelength resonator for frequencies right around 3–4 kHz. This isn’t a design flaw. It’s actually evolutionary brilliance because this is exactly where human speech carries the most information. Your ears are literally tuned to pick up conversation, which meant better survival odds for your ancestors.
But here’s where it gets tricky for mixing: this natural resonance creates a sensitivity peak between 2 and 5 kHz. The science nerds call this the equal-loudness contour, originally mapped out by Fletcher and Munson back in 1933. The modern ISO 226:2003 standard confirms what they found—our ears are dramatically more sensitive to this frequency region than any other part of the spectrum.
What does this mean in practical terms? A sound at 3 kHz will seem significantly louder than a sound at 100 Hz or 10 kHz, even when they’re actually hitting your eardrum at the same sound pressure level. Your ear canal is physically amplifying these frequencies by several decibels before they even reach your brain for processing.
This is why mixing at consistent monitoring levels matters so much. At lower volumes, the equal-loudness curves show even more dramatic dips around 3–4 kHz, meaning your ears become hypervigilant to this range. Crank the volume up, and those curves flatten out—but by then, you’ve already made EQ decisions based on what you heard at low levels. This is the loop that traps bedroom producers every single time.
Most people start hunting for harshness around 5–8 kHz because that’s where sibilance lives. But the real demons are hiding lower. Here’s the breakdown:
2–3 kHz: This is nasal territory. When vocals sound like they’re coming through a telephone or your snare has that annoying “honk,” you’re dealing with buildup here. It’s not piercing yet, but it’s aggressive and fatiguing. Acoustic guitars and pianos can pile up here too, especially when you’ve got multiple layers fighting for space.
3–4 kHz: The danger zone. This is where your ear canal’s natural resonance peaks, which means it’s also where harshness hits hardest. Vocals can turn from present to painful here. Cymbals get that metallic edge that cuts through everything else in your mix. Electric guitars go from defined to ice-pick central. This range is responsible for that “brittle” quality that makes listeners reach for the volume knob within thirty seconds.
4–5 kHz: Still sensitive territory, but now you’re in the definition and clarity zone. Boosting here can bring vocals forward in the mix and add attack to drums. But too much? You’re back in harsh city, especially on female vocals or bright synths.
The tricky part is that you actually need energy in this range. It’s where consonants in vocals live, where the crack of a snare comes from, where acoustic instruments get their articulation. Cut too much and your mix sounds like it’s wrapped in a blanket. Leave too much and you’re causing ear fatigue before the first chorus hits.
Ever notice how your low end disappears when you turn down your monitors? That’s the equal-loudness contours at work. At lower SPL levels (sound pressure levels), the contours show massive dips in the bass range—you literally can’t hear low frequencies as well when things are quiet. Your instinct is to boost the bass to compensate.
But here’s the trap: when you turn it up later, that bass you added suddenly dominates everything. And here’s where it connects to the 2–5 kHz problem—when your low end is too loud, it masks everything else, forcing you to boost the midrange to compensate. Before you know it, you’re in an EQ war with yourself, and the 2–5 kHz range is the casualty.
The equal-loudness curves flatten out as volume increases. This means that frequency balance you carefully crafted at bedroom levels is going to sound completely different when someone plays your track loud in their car. The bass will feel massive, and if you’ve been overcompensating in the 2–5 kHz range to cut through a bass-light quiet mix, things are going to sound harsh and aggressive.
The pros know this, which is why they constantly reference their mixes at different volumes. Not just “a little quieter” and “a little louder.” We’re talking whisper-quiet (where you can barely make out the elements), normal listening level (roughly 75–85 dB SPL), and occasionally pushing into louder territory to check for harshness. Each volume level will reveal different problems.
Here’s a workflow that actually works: do your heavy mixing at a moderate, consistent level (around 75–85 dB SPL), which is roughly equivalent to having a normal conversation at arm’s length. This is where the equal-loudness curves are most balanced. But every 20 minutes or so, drop the volume way down. If your mix still makes sense and holds together when it’s quiet, you’re on the right track. Then occasionally push it up to check that nothing’s turning harsh or piercing.
Here’s where most people go wrong: they find the harsh frequency, grab their EQ, make a 3 dB cut, and call it a day. Static EQ cuts might solve the problem in one section, but they’ll rob you of presence and clarity in another. That snare might sound perfect during the verse, but once the chorus kicks in with all the guitars and synths, you need that 3–4 kHz energy to cut through.
This is where dynamic processing becomes your best friend. I’m talking about three specific tools: dynamic EQ, multiband compression, and resonance suppressors. Each one handles harshness differently, and knowing when to use which one is the difference between a mix that sounds professional and one that sounds… fine.
Dynamic EQ is surgical. Think of it as an EQ that only activates when things get too loud at a specific frequency. Got a vocal that sounds great until the singer belts and suddenly 4 kHz jumps out and slaps you? Set up a dynamic EQ band at 4 kHz with a narrow Q (around 2–3), threshold it so it only kicks in when the vocalist gets loud, and use a gentle 2–3 dB cut. Fast attack (2–5 ms) to catch those peaks, medium release (70–120 ms) to recover naturally.
The beauty of dynamic EQ is precision. You can target exactly 3.2 kHz with a surgical Q of 4.5 and only reduce it when it crosses your threshold. The rest of the time, that frequency sits untouched, preserving the natural character of the source. This is perfect for vocals, acoustic guitars, snare drums—anything where the harshness is intermittent rather than constant.
Multiband compression thinks bigger. Instead of targeting a single frequency, it divides your signal into bands and compresses each independently. This is less about surgical fixes and more about overall tonal balance. If your entire drum bus is too aggressive in the 3–7 kHz range, you can set up a high-mid band, apply compression with a 2:1 or 3:1 ratio, and control the whole region dynamically.
The key with multiband compression is the attack and release times. For controlling harsh cymbal transients, you want a faster attack (25–40 ms) that catches the initial hit but a release that’s quick enough (60–100 ms) to let the tail ring naturally. Too slow on either end and you start hearing the compression working, which defeats the purpose. Set your threshold so you’re getting maybe 2–4 dB of gain reduction on the peaks—enough to control without suffocating.
Resonance suppressors are the new kids on the block, and they work differently than both. They’re analyzing the spectral content in real-time and identifying specific resonant frequencies that are building up. Instead of just reducing level, they’re actually targeting and removing the problematic harmonics while leaving the fundamental and useful content alone. This is next-level stuff for dealing with harshness that comes from harmonic stacking rather than just volume.
Here’s a real-world approach: start with a static EQ to handle the broad strokes. Maybe a gentle 1–2 dB shelf reduction starting around 3 kHz. Then add a dynamic EQ for precision work on specific problem frequencies. If you’re dealing with a full mix or complex bus, layer in multiband compression for overall control. And if things are still resonating in weird ways, hit it with a resonance suppressor as the final polish.
Different DAWs handle this problem with different tools, and if you’re learning at Music City Accelerator, you’re probably working in either Pro Tools or Ableton Live. Let’s talk about what’s in your arsenal.
Pro Tools comes with some solid stock options. The Channel Strip plugin includes a 4-band parametric EQ that’s surprisingly capable. The seven-band EQ gives you more flexibility for surgical work. But here’s the reality—most Pro Tools users reach for third-party plugins for serious harshness control because the stock dynamics processors don’t offer the precision you need for this kind of work.
FabFilter Pro-Q 3 is the industry standard for a reason. It gives you dynamic EQ capabilities right inside a familiar parametric EQ interface. You can set any band to be dynamic, dial in your threshold, and visually see exactly when and how much the EQ is working. Pro-MB is FabFilter’s multiband solution, and it’s equally powerful. For Pro Tools users serious about controlling harshness, these are worth the investment.
Ableton Live approaches things differently. The stock EQ Eight is actually really capable for static EQ work—eight bands, multiple filter types, and a clean interface. But Live doesn’t have a built-in dynamic EQ. You can approximate it with Multiband Dynamics, though. Here’s the trick: set your crossover points to isolate the harsh frequency range (say, 3–5 kHz), apply compression only to that band with a low threshold, and leave the other bands untouched. It’s not as precise as dedicated dynamic EQ, but it works.
For Ableton users who want real dynamic EQ, TDR Nova is a free plugin that’s shockingly good. It offers true dynamic EQ functionality with threshold controls, visual feedback, and the precision you need for tackling harshness. The stock Channel EQ is also useful for broad tonal shaping, especially on returns or buses where you need quick, musical results.
The key in either DAW is understanding that the tools don’t matter as much as your ears and your approach. You can get professional results with stock plugins if you understand what you’re listening for and how to use the tools strategically.
Let’s bring this all together into a workflow you can use today. This isn’t theory. This is what works in actual mixing sessions when you’ve got a deadline and a client expecting professional results.
Step 1: Start Clean
Before you do anything else, high-pass every track that doesn’t need low-end information. Vocals, guitars, snares, hi-hats—get rid of everything below 80–100 Hz. This isn’t about the 2–5 kHz range directly, but it matters because when your low end is cluttered, you’ll compensate by pushing the mids and highs, which leads directly to harshness. Clean bass equals less need for aggressive midrange.
Step 2: Find the Problems
Solo the tracks that are most likely to cause issues—vocals, snare, hi-hats, acoustic guitars, bright synths. Sweep a parametric EQ through the 2–5 kHz range with a narrow Q and a 5–6 dB boost. When you hit the harsh frequency, it’ll jump out at you. Make a mental note (or an actual note) of where it lives for each source.
Step 3: Make Static Cuts First
For harshness that’s consistent throughout the track, use static EQ. A gentle 2–3 dB cut with a moderate Q (around 1.5–2.5) will take the edge off without destroying presence. Don’t go narrow and deep unless you’re dealing with a very specific resonance—broad and gentle is usually more musical.
Step 4: Add Dynamic Control
For harshness that comes and goes—a vocalist who gets bright when they belt, a snare that rings harsh on the harder hits—dynamic EQ is your move. Set your band, dial in the threshold so it only activates when things get harsh, and use a gentle reduction. You want this to be transparent. If you can hear it working, you’ve gone too far.
Step 5: Check in Context
Here’s the crucial part that separates the pros from everyone else: you can’t mix vocals in solo. You can’t mix snares in solo. These decisions only matter in the context of the full mix. What sounds perfect when soloed might be completely wrong when everything else is playing. Make your cuts and boosts, then immediately check them with the full mix running. If it’s still harsh with everything playing, you haven’t fixed it yet.
Step 6: Reference at Multiple Volumes
I already beat this drum, but it bears repeating: check your mix quiet, check it at normal level, and check it loud. The 2–5 kHz range behaves differently at each volume due to those equal-loudness contours. If it sounds good at all three levels, you’ve nailed it.
Step 7: Compare to References
Pull up three or four professionally mixed tracks in the same genre. A/B them against your mix at matched volumes. Pay specific attention to how they handle the 2–5 kHz range. Is there more energy there than in your mix? Less? Different? This will recalibrate your ears and show you what’s possible without crossing into harshness.
Here’s what you need to understand: the goal isn’t to remove all energy from the 2–5 kHz range. That’s where clarity, definition, and presence live. The goal is to control it so it serves the mix instead of dominating it.
Think of it like this: in a great mix, no single frequency range should demand all your attention. The low end should be solid and supportive without being boomy. The high end should be airy and detailed without being brittle. And the midrange—especially that 2–5 kHz pocket—should bring definition and energy without causing fatigue.
The reason this matters so much at Music City Accelerator is that we’re training you for real-world mixing situations. You’re not just learning button-pushing. You’re learning to hear problems, diagnose their causes, and solve them in ways that serve the song. The 2–5 kHz challenge is one of the most common problems you’ll face in every genre, on every project, forever. Master it now, and you’ll be steps ahead.
Your ears are sensitive to this range for a reason. Your job as a mixer is to work with that sensitivity, not against it. Use the biology and physics to your advantage. Understand why things sound harsh, where the problems are coming from, and which tools solve which problems.
Because at the end of the day, a great mix isn’t about following a formula or sticking to a chart. It’s about understanding the why behind what you’re hearing, making informed decisions based on that understanding, and having the technical chops to execute those decisions cleanly.
That’s what separates the hobbyists from the professionals. And that’s exactly what you’re learning here.
Want to master the technical skills that make professional mixes possible? Music City Accelerator’s Pro Tools and Ableton Live programs give you hands-on training in audio engineering, mixing, and production from industry professionals. Whether you’re just starting out or leveling up your skills, our San Francisco studios and expert instructors will help you understand the science and art behind great sound. Learn more about our programs and start your journey today.
© Music City San Francisco 2026
Experience the vibrant rhythms and captivating melodies of Latin music as we feature live bands and electrifying DJ sets, showcasing a diverse array of genres from Brazilian Rhythms/Salsa/Cumbia/Latin Jazz/Spanish Rumba/Latin Rock/ Forró & global beats. Feel the energy as talented musicians take the stage, bringing their unique flair and passion to every performance.
Enjoy DJ sets spinning Latin Jams with Disco 80s/90s Funk/Hip Hop/Tropical Bass/Rock/Breaks & more.
Doors Open: 6 PM
Live Performances Begin: 7 PM-10PM
Step into the rhythm and soul of the city at Music City SF every Tuesday for an unforgettable night of live jazz! Wheter you’re a jazz aficionado or just looking to unwind, our talented musicians will transport you through the smooth, sultry sounds of Classic Jazz, Soul Jazz, and Jazz Fusion.
Door Opens: 6 PM
Live Performance Begin: 7 PM – 10 PM
Step into the unexpected at Music City SF’s Eclectic Night, where musical boundaries are meant to be crossed! Every Friday, we bring you an exciting mix of artists, from funk to jazz, hip hop to rock, and everything in between.
Doors Open: 6pm
Live Performances Begin: 7 PM-10PM
Every Thursday night, dive into the heart of the underground with weekly rotating performances featuring a fresh mix of musicians, cyphers, and DJs that keep the energy alive. Whether you’re here for smooth R&B vibes, soulful vocals, or fire hip-hop beats, The Music City Underground has it all.
Doors Open: 6 PM
Live Performances Begin: 7 PM-10PM
Step into a time machine of music and let the decades take you on an unforgettable journey! Relive the hits from the ’60s to the ‘2000s with incredible tribute performances that’ll have you dancing all night long.
Doors open at 6 PM.
Performances kick off at 7 PM.

From timeless classics to deep cuts that defined an era, keep the dance floor alive with the irresistible rhythms and smooth sounds that made Motown legendary. Don’t miss a night of soulful vibes and nonstop energy!
Door Opens: 6 PM
Live Performance Begin: 7 PM – 10 PM
Experience a thrilling variety of Rock, Folk, Blues, and Country music every Wednesday night! A high-energy event featuring live bands and DJs across six stages! From rock anthems to country classics and everything in between, this night promises non-stop entertainment and unforgettable performances.
Doors Open: 6 PM
Live Performances: 7 PM – 11 PM
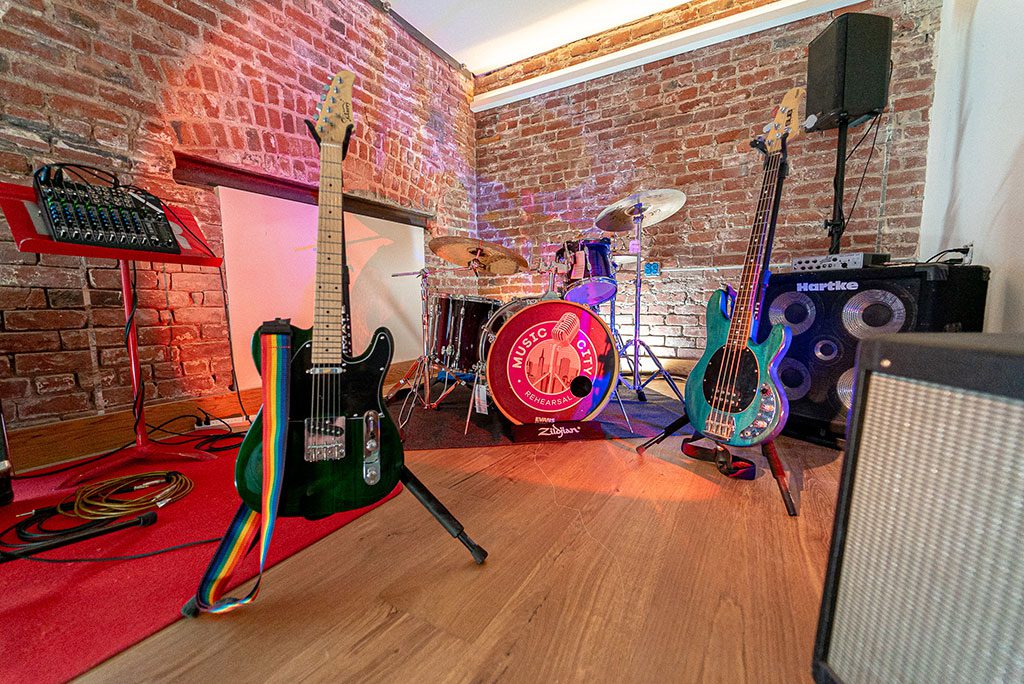
The Singer-Songwriter + Performance Program is coming to Music City Accelerator, housed inside Music City Starfactory — a seven-stage live music hub in the heart of San Francisco. Step into a bustling ecosystem of artists and bands, rehearse in real studios, perform on stages streamed live to the world, and even stay on-site while you train. This is a one-stop launch pad for aspiring artists ready to grow fast inside a community that lives and breathes music every day.


Deborah Barsotti
Education director
deb@musiccitysf.org
More info coming soon!
Aprill Lacey
Executive Director
Aprill@musiccitysf.org


Contact Aprill for booking inquiries!