If Pro Tools routing feels confusing, you are not alone. A lot of people open a session, create a track, and immediately hit the same wall: What’s the difference between an input, an output, a bus, an Aux track, and a send?
Why can’t I hear my reverb?
Why is my vocal not showing up on the track I armed?
Why does Pro Tools make something simple feel like studio calculus?
The good news is that Pro Tools routing is not actually complicated once you see it as signal flow. That’s the whole game.
Audio comes into Pro Tools through an input. It goes through a track. Then it leaves through an output. Along the way, you can also send copies of that signal to buses and Aux tracks for effects, submixes, cue mixes, and more. This is Signal Flow 101: configure your interface and I/O, create busses, then use Aux tracks and sends to route audio where you need it to go.
Once you understand those parts, Pro Tools starts feeling like a real studio instead of a maze.
Start here: what routing means in Pro Tools
Routing is just the path your audio takes.
A simple example looks like this:
Microphone → audio interface input → Pro Tools audio track → main output → speakers
That’s basic routing.
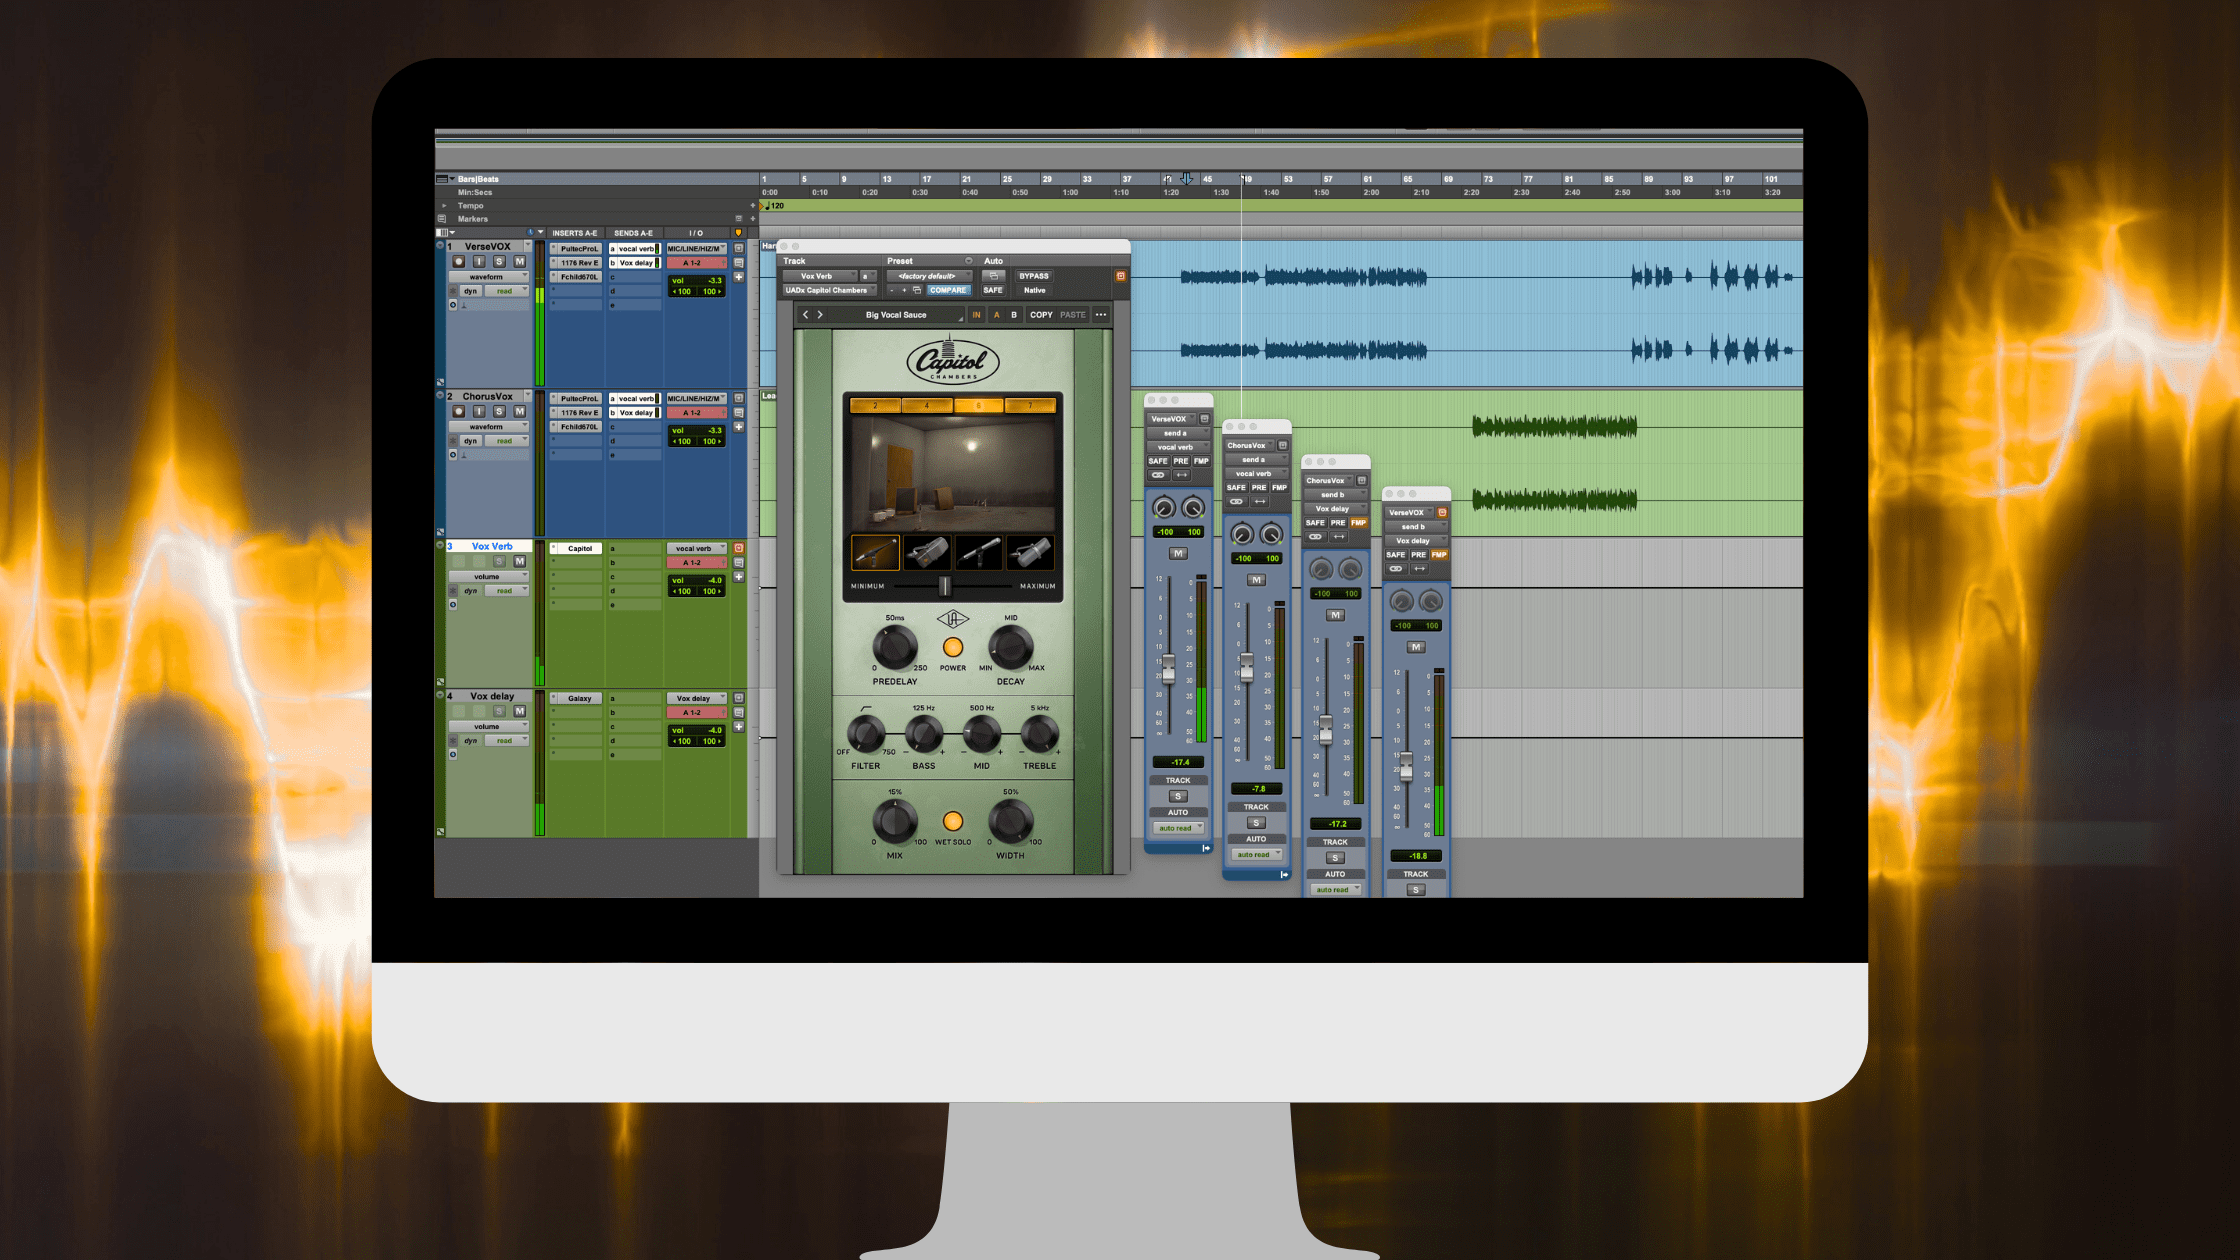
Now let’s say you want some reverb on the vocal without printing the effect directly onto the track. Instead of inserting a reverb plugin directly on the vocal track, you send some of that vocal signal to a reverb Aux track through a bus. That gives you more control, and it’s one of the most common workflows in professional sessions. You can send multiple tracks to one Aux which uses far less processing power than using a reverb inserted on every track and you also get the ability to EQ just the reverb and not the actual audio passing through the reverb. This is a classic technique, you must EQ your verb!
That’s routing too.
The best way to understand Pro Tools is to break routing into five core ideas:
- Inputs
- Outputs
- Busses
- Aux tracks
- Sends
Let’s make each one simple.
1) Inputs: where audio enters Pro Tools
Inputs are the source channels coming from your audio interface.
If your mic is plugged into Input 1 on your interface, you’ll usually set your vocal track’s input to Input 1 in Pro Tools. After selecting your playback engine first, open Setup > I/O and verify that the interface’s channels are correctly assigned in the Input and Output tabs.
So if you’re recording and getting no signal, this is one of the first places to check:
- Is the correct interface selected as the playback engine?
- Is the track input assigned to the right hardware input?
- Does the I/O setup match the interface you’re actually using?
If you switched interfaces, opened someone else’s session, or changed templates, your I/O can get messy. The best way to fix this quickly is going to Setup > I/O and using Default to reset paths to the current interface when needed. This has saved countless sessions over the years.
Beginner rule: If audio is not getting into the track, check the input first.
2) Outputs: where audio leaves the track
Outputs are where the track goes after Pro Tools processes it.
Most of the time, a standard audio track outputs to your main monitor path, usually something like Output 1–2.
That means the audio leaves that track and goes to your speakers or headphones through your interface. In the I/O Setup window you can see this relationship. The I/O is your virtual patch bay (but much cheaper!).
Outputs can also go somewhere other than your speakers.
For example:
- to a headphone mix
- to a print track
- to a bus instead of a hardware output
- to a stem recording path
That last one matters a lot for mixing and stem printing.
Beginner rule: If audio is getting through the track but you can’t hear it where you expect, check the output.
3) Buses: the invisible roads inside Pro Tools
A bus is an internal routing path.
It’s not a physical cable. It’s a virtual signal path inside the session.
You use busses when you want audio from one track to go to another track or destination inside Pro Tools.
Common examples:
- multiple drum tracks routed to a drum bus
- a vocal send feeding a reverb Aux
- guitars routed to a guitar subgroup
- a cue mix feeding a headphone Aux
So if inputs and outputs connect Pro Tools to the outside world, buses are how tracks talk to each other inside the session.
This is one of the biggest mental shifts for beginners: A bus is not the same thing as an Aux track.
A bus is the path. An Aux track is the destination track that receives that path.
Think road vs room.
4) Aux tracks: where shared processing happens
An Aux track is a track that receives audio but does not record audio like an audio track does.
To route audio to an Aux, you set the Aux input to a bus, then place plugins on the Aux to process whatever signal comes in. Best practice is to always label your busses, you can right click to rename or use the I/O. Some of us have bus trauma from seeing dozens of unlabeled busses in large sessions!
This is why Aux tracks are used for:
- reverb returns
- delay returns
- parallel compression
- drum submixes
- vocal buses
- headphone mixes
A classic example:
- Your lead vocal track stays dry
- You create a stereo Aux track and label it Vocal Verb
- You set its input to Bus 15–16 (then label the bus!)
- You insert a reverb on the Aux
- On the vocal track, you create a send to Bus 15–16 which has been labeled vocal verb or something clever.
Now the vocal stays clear, but you can blend in as much reverb as you want.
That is one of the most foundational routing setups in Pro Tools.
Beginner rule: If you want to process multiple tracks together or set up shared effects, create an Aux track.
5) Sends: how you feed an Aux without changing the main output
A send creates a copy of a track’s signal and routes that copy somewhere else.
Usually that “somewhere else” is a bus feeding an Aux track.
This is what makes sends so useful:
The track can still go to the main output, while also sending some of its signal to reverb, delay, parallel compression, or a cue mix.
So if your vocal outputs to Output 1–2, you can still create a send to Bus 15–16 for reverb.
The main vocal still hits the mix bus. A copy goes to the reverb Aux.
That’s how most modern mixes are built.
Beginner rule: If you want the original track to stay where it is, but also feed an effect or alternate mix, use a send.
The simplest Pro Tools routing setups you should know
Let’s make this practical.
A) Recording one microphone
Use this when recording a vocal or instrument.
- Playback engine set to your audio interface
- I/O paths verified in Setup > I/O
- Audio track input set to the hardware input your mic is plugged into
- Track output set to Main Out / Output 1–2
That’s the most basic routing chain and works 100% of the time unless something else is not set up correctly in your studio. Or turned on…
B) Setting up a reverb Aux
Use this in almost every mix.
- Create a stereo Aux track
- Set the Aux input to an unused stereo bus
- Insert a reverb plugin on the Aux
- On any audio track that needs reverb, create a send to that same bus
Now one reverb can serve multiple tracks. That saves CPU, keeps the mix more cohesive, and gives you one fader to control the whole effect return.
C) Creating a drum bus
Use this when you want to process multiple drum tracks together.
- Set kick, snare, toms, overheads, and room tracks to output to a stereo bus
- Create a stereo Aux track called Drum Bus
- Set the Aux input to that same stereo bus
- Put compression, EQ, or saturation on the Drum Bus Aux
- Set the Drum Bus Aux output to your main output
Now your full drum mix can be shaped from one fader and one processing chain.
D) Building a headphone cue mix
Use this when an artist wants their own headphone blend.
- Create an Aux track feeding the headphone output
- Use sends from key tracks into that bus
- Adjust send levels to build the performer’s preferred mix
- Route the Aux output to the correct headphone output on your interface
This is one of the most useful practical routing workflows in real studio sessions.
The most common Pro Tools routing mistakes
If routing feels frustrating, it’s usually one of these.
Mistake 1: The I/O setup is wrong
This happens all the time after changing interfaces or opening someone else’s template.
Fix: go to Setup > I/O and verify or default your Input, Output, and Bus tabs.
Mistake 2: Confusing a bus with an Aux track
A bus is just the path. An Aux is the receiving track.
Fix: remember road vs room.
Mistake 3: Changing the main output when you meant to use a send
If you change the output of a track to a bus, you are rerouting the whole track there. If you use a send, you’re creating a copy.
Fix: use a send when you want parallel or shared effects. Use the output when you want to fully reroute the track.
Mistake 4: Forgetting to set the Aux input
If the Aux isn’t receiving the same bus you’re sending to, you won’t hear anything.
Fix: match the bus on the send and the Aux input exactly.
Mistake 5: Trying to fix complex routing before understanding signal flow
Routing gets easier when you follow the audio step by step.
Fix: ask one question at a time.
Where is the signal coming from? Where is it supposed to go next?
That mindset solves most routing problems.
A simple way to think about routing forever
If you want the simplest mental model, use this:
- Input = where audio comes in
- Track = where audio lives
- Output = where audio goes out
- Bus = internal path
- Aux = receiving/processing track
- Send = copy of the signal to another destination
That’s it.
Once that clicks, routing stops feeling like menus and starts feeling like flow.
Why Pro Tools routing matters so much
This isn’t just “technical DAW stuff.” Routing is one of the core skills that separates people who can record themselves from people who can run a real session.
If you understand routing, you can:
- track vocals confidently
- set up reverb and delay correctly
- build drum buses and vocal buses
- create cue mixes for artists
- print stems and alternate versions cleanly
- troubleshoot signal problems fast
It’s one of the most important foundational studio skills you can learn.
Learn Pro Tools routing hands-on at Music City Accelerator
If you want to get comfortable with Pro Tools in a real studio workflow, hands-on training changes everything.
At Music City Accelerator, we teach Pro Tools in a practical way that connects the software to real recording, editing, and mixing sessions. That includes routing, I/O setup, bus structure, Aux returns, and the kinds of signal-flow decisions that matter in actual studios.
If you’re ready to stop guessing and start understanding what Pro Tools is doing, explore our programs and training paths.